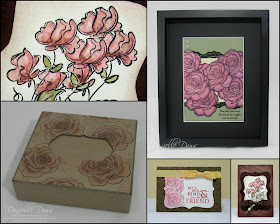
Basic Masking
Masking is a simple and quick technique that can have a really big impact on your work. You'll be able to create overlapping images, creating depth in your images.
You'll need:
Stamp set
Paper/Cardstock
Inks
Post-it notes
Stamp-A-Ma-Jig
Stamp the images you want to mask onto a Post-it note - position your image so that you can make the most of the adhesive strip.
I'm using purple Post-it notes so that I can clearly see which images are masked and which aren't.
Cut out your masks - trim as close to the edge as possible.
TIP - trial using your masks on some scrap paper. Depending on the thickness of your masks, you may need to trim the image further.
You've created your masks!
TIP - When you've finished your project, be sure to store your masks away to use again another time. I store mine in the case with the stamps.
The process of stamping with the masks is relatively easy. All you need to do is to place your masks over the images that you want to protect, (that's why you need to make the most of the adhesive backing on the Post-it note!), and then stamp the rest of your images.
Use your SAMJ to position carefully, or be brave and wing it! The sequence of photos below show both approaches and will hopefully give you a good idea of what it's all about!
And here's the final product...
Like I mentioned earlier, I used my SAMJ to create the background effect.
Some more masking examples...
Danielle


No comments:
Post a Comment